When you want to create a fire effect on a colored image, your have found yourself the right tutorial! Here I will show you how you can apply my smoke and layer styles combination to a colored image. I will use Affinity Photo for this tutorial, but the same process can be done in photoshop.
We will use the following image from Pixabay for this tutorial. Thanks to SuperFerFilm for providing such cute images for free.
https://pixabay.com/photos/portrait-beautiful-model-young-3501987/

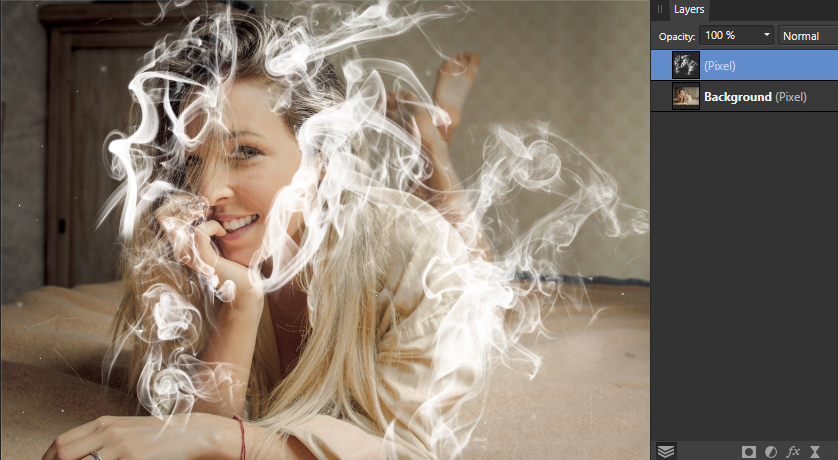
Step 1: Paint Smoke
Create a new layer and paint some smoke so it will wrap around the person or object you want to set on fire:
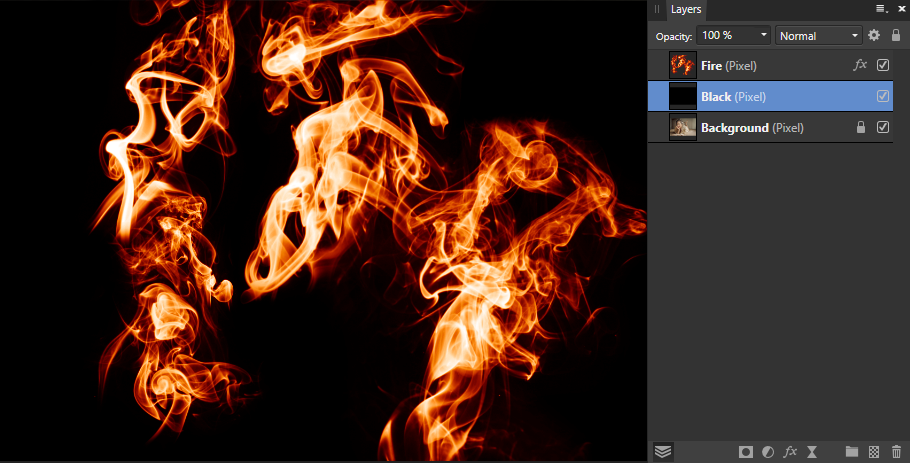
Step 2: Add Fire Style
Now create a black layer below the smoke layer, and add the fire style as described here. You can as well download the styles from here.
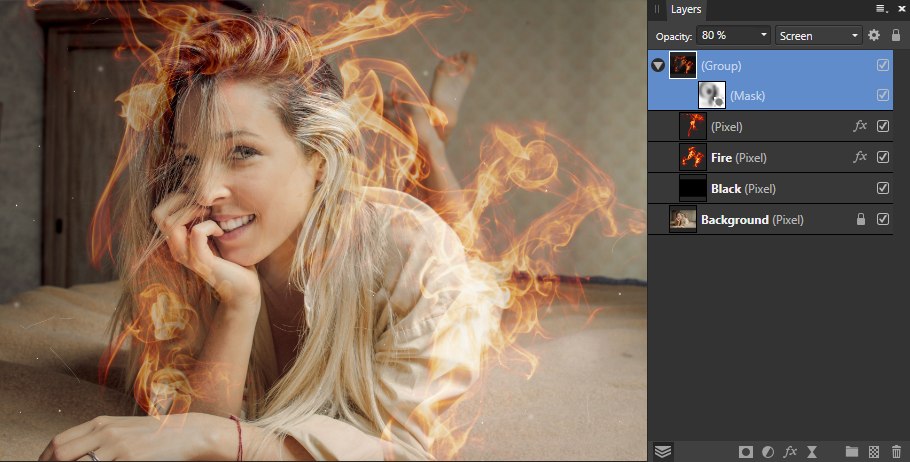
Step 3: Group and Screen Mode
Now we will use a little trick that can be useful wherever you need to use multiple blending modes for the same layer.
- Create a new group.
- Move the fire and black layer into the group.
- Change the blending mode of the group to “Screen”.
Step 4: Opacity and Masking
To make the whole thing more realistic and merge with the photo do the following:
- Change the opacity of the group to 80% or any other value so it looks good on the image you are using.
- Add a layer mask and use a soft brush with an opacity of around 20-30% to hide some of the smoke that doesn’t blend in that well.
- You can as well remove some of the smoke on your fire layer and add other layers to fit your image better. I did that on the left side of the face, because the smoke I used there was not fitting so well.
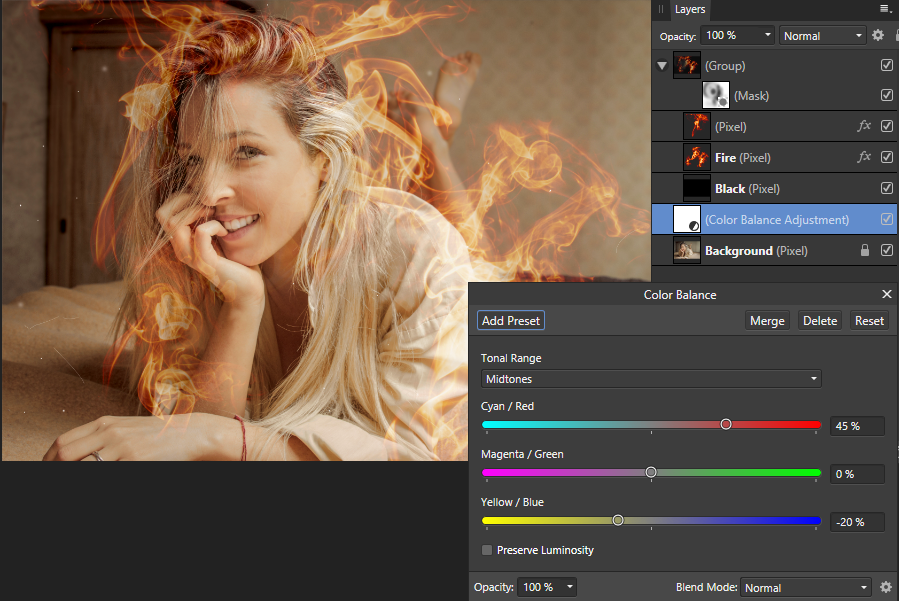
Step 5: Adjustments
Now to match the colors of the image with the fire, I use “Layer >> New Adjustment Layer >> Color Balance” to create a new layer right above the original image, and tweak the colors a bit to get a glow that matches the fire. In this case the image already was a really good base for the effect, other images might benefit much more from this adjustment.
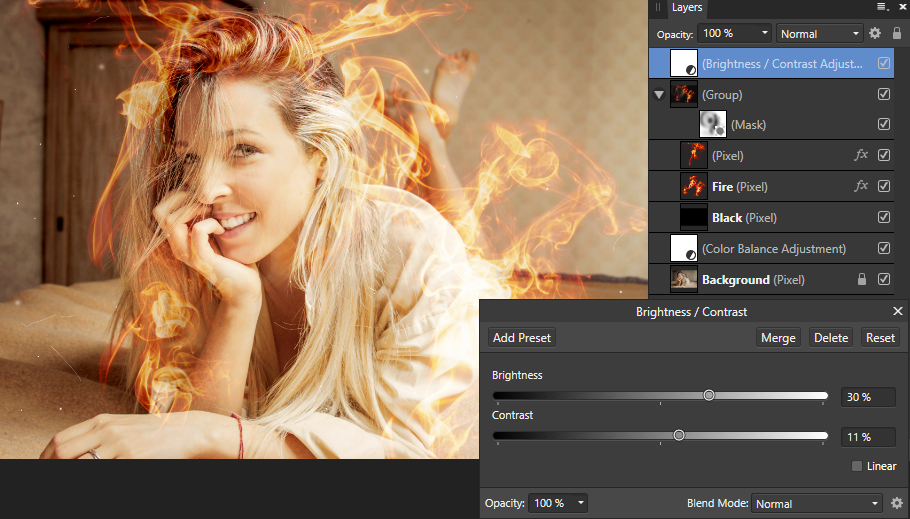
Also I use “Layer >> New Adjustment Layer >> Brightness/Contrast” to give a bit more life to the whole image:
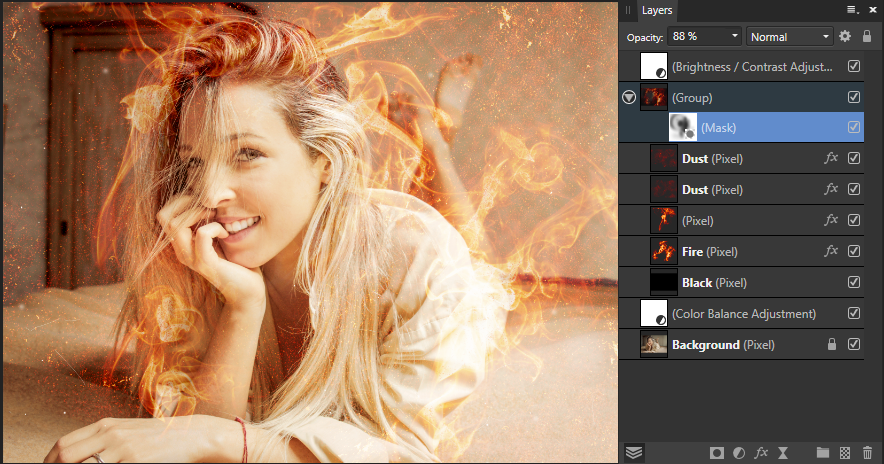
Step 6: Add Details
If you want you can decorate your fire effect like explained here. I used my dust brushes to add some sparks to this design:
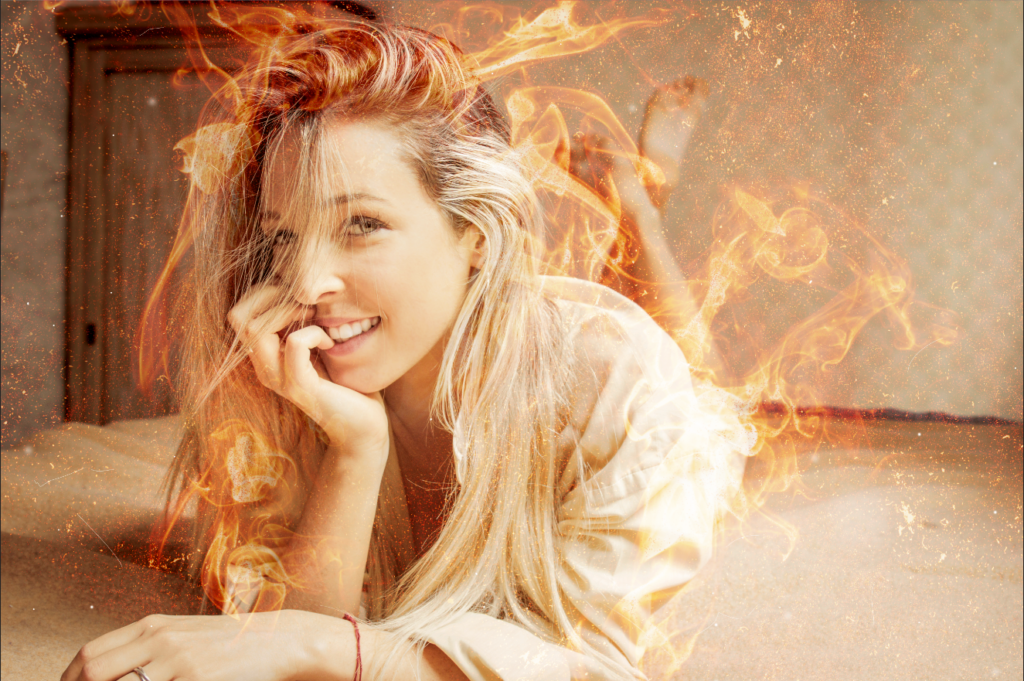
The Final Result
Here is my final result. If you like this tutorial, feel free to support me by sharing it with your friends. You can use the share buttons below this post.
I like the method you use for teaching your tuttorials. Very easy to follow. Thank you
Thanks for this tutorial and the brushes provided. Awesome work. Greatly appreciated. I hope you continue to add interesting tutorials. I will bookmark and visit the site regularly.
Cheers
Brilliant, thank you so much.
You’re welcome, thanks for the good feedback!
Fabulous tutorial.
Currently learning how to use Affinity Photo and Designer and this fantastic. Goodness knows what my piece called ‘Fire’ will look now and I never knew that brushes and styles could be used like this.
Thank you and best wishes.