Ever needed to power up some of your images with 42 million volt and beyond? Learn how to do it in this tutorial.
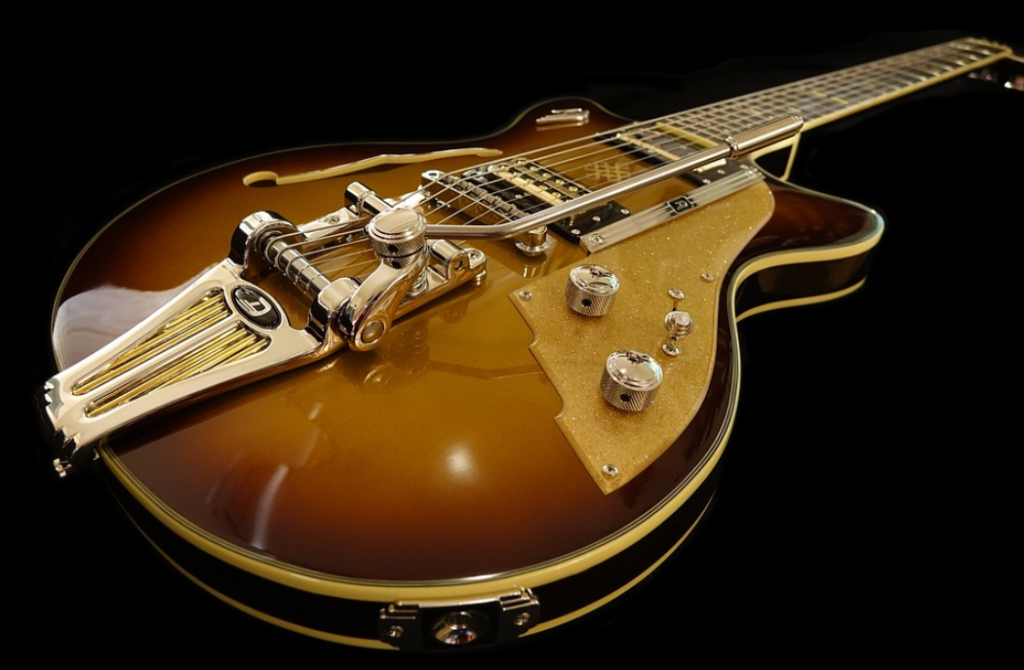
Base Image
For this tutorial we will use the E-Guitar image created by obBilder. Make sure to check out his profile and leave him some likes or a cup of coffee. 🙂
https://pixabay.com/photos/e-guitar-instrument-music-1736291/
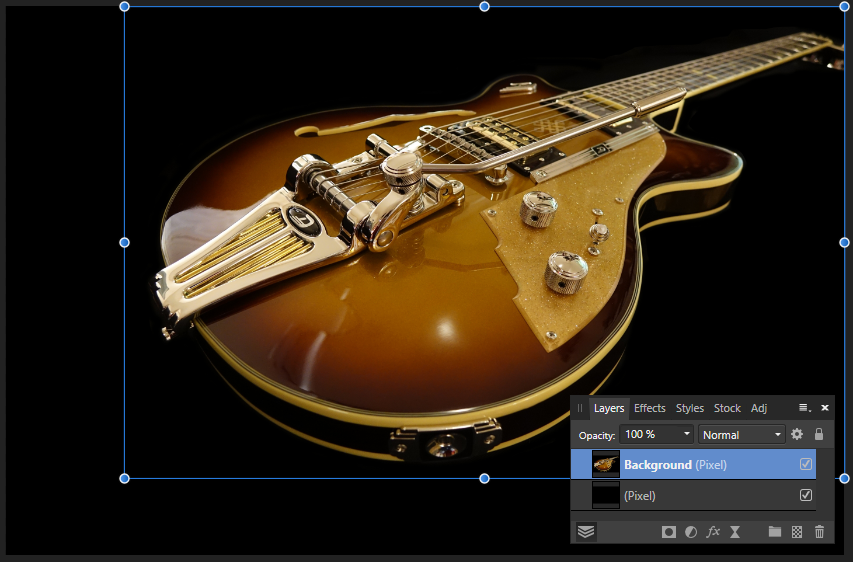
Step 1: Setup
I will use Affinity Photo for this tutorial, but you can do the same steps in other design tools as well.
To have a bit more space for the electric effect, let’s create a black background and place the guitar on top of it a bit smaller.
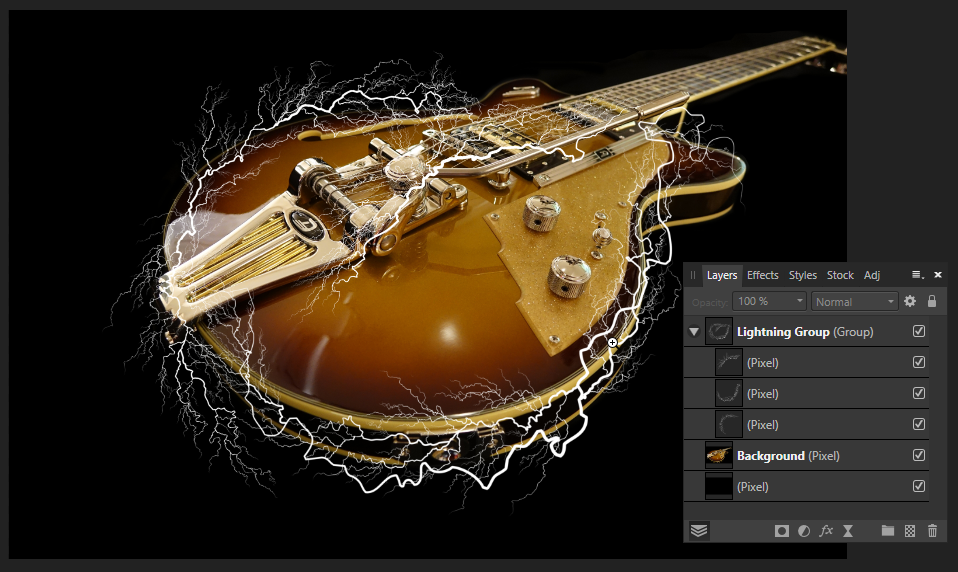
Step 2: Lightning Brushes
For this tutorial we will use my Lightning Brushes, there are commercial and non-commercial version of the brushes ready for you to download working with Affnity and Photoshop. To import the brushes check out this post.
After you get the brushes, do the following
- Create a new layer group.
- Create one layer for each lightning brush you use in the group.
- Go through the brushes and use the ones you like.
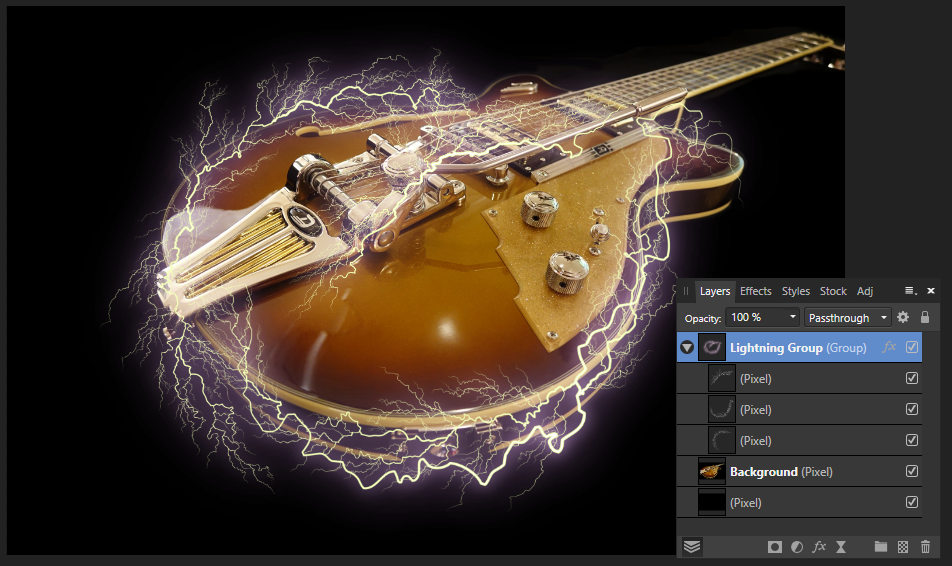
This is my image:
Step 3: Lightning Effect
Now we will use layer effects to style the the lightning like real electricity. If you bought a commercial version, there are already some styles includen in the package.
Apply the following layer effects to the layer group containing the lightning:
Outer Shadow: #EFA8FF
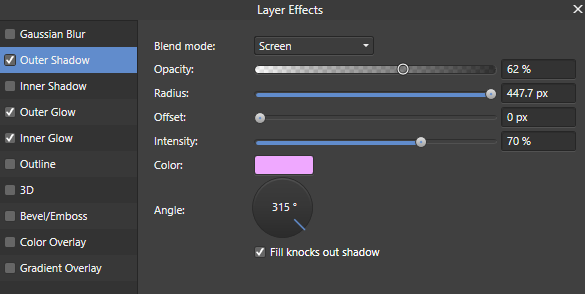
Outer Glow: #E5AFFF
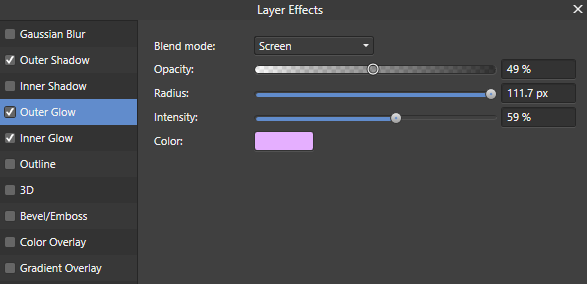
Inner Glow: #EEFFA0
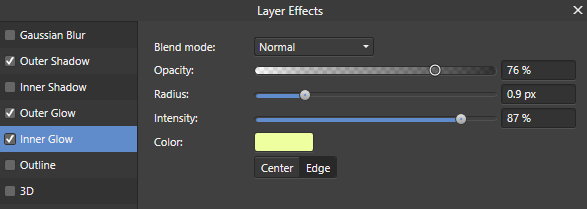
The effect will look like this:
Step 4: Opacity and Masking
To make the effect look more real, we will fiddle around with the opacity of the layer group.
- Set the opacity of the group to 90%
- Create a layer mask on the group.
- Use a black soft brush to to partially reduce the opacity of the lightning.
Some slight changes, I also added some additional lightning below the guitar and rearrenged some of the electricity.

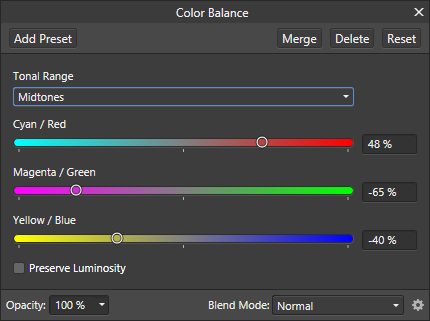
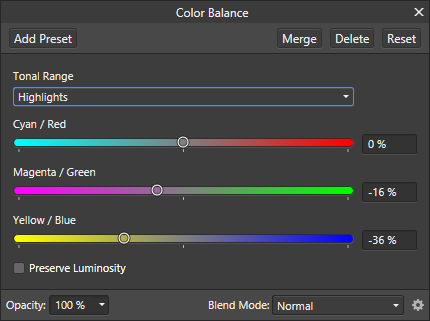
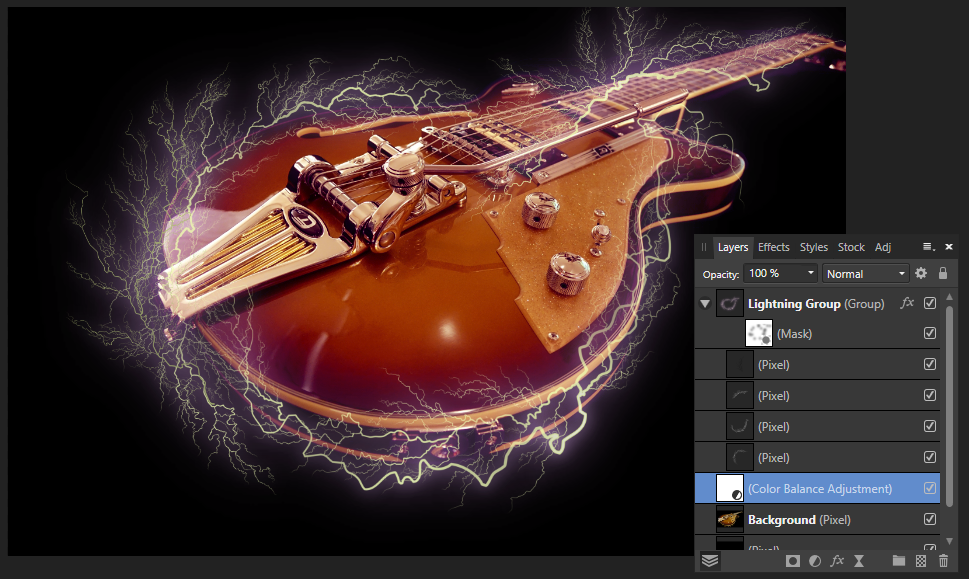
Step 5: Color Balance
Currently the guitar and the lightning effect doesn’t really match up in colors. So we add a new Color Balance Layer right above the guitar using “Layer >> New Adjustment Layer >> Color Balance…”.
I used the following settings:
Shadows:
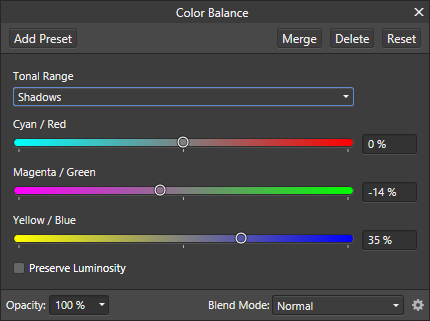
Midtones:
Highlights:
The current image with color balance applied:
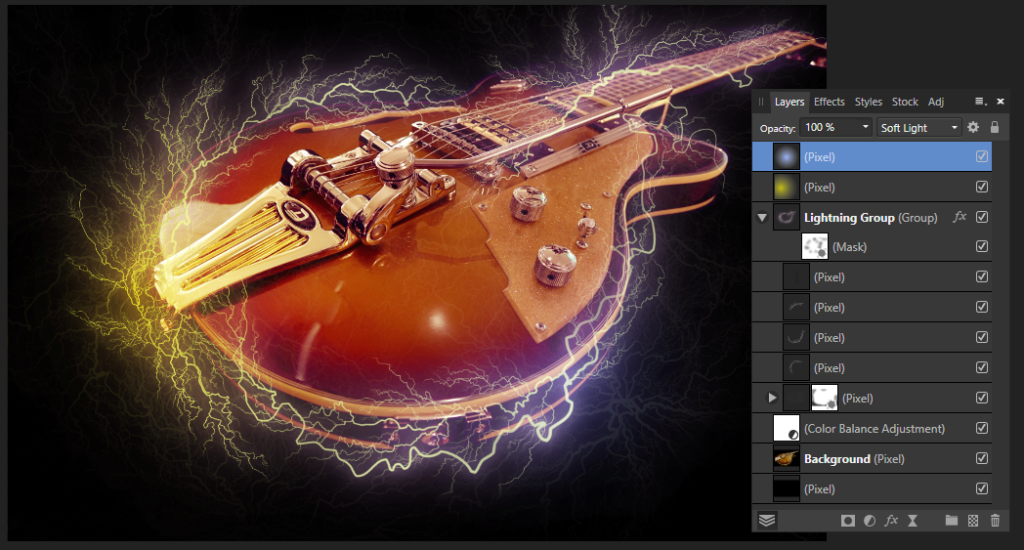
Step 6: Colorize and Background
Now use a soft brush or the gradient tool to create some new Layers with a round and soft color circle. As blend mode “Soft Light”, “”Overlay” and “Vivid Light” are the most suitable for this effect. Choose the colors and blend modes to your liking. I have also added some additional lighting in the background with an opacity of 7%, so the background doesn’t look that empty.
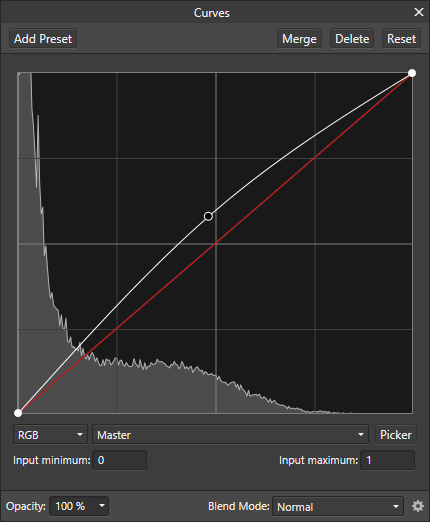
Step 7: Final Adjustment
To make the whole image a little bit more shiny, I have added a curve adustment layer:
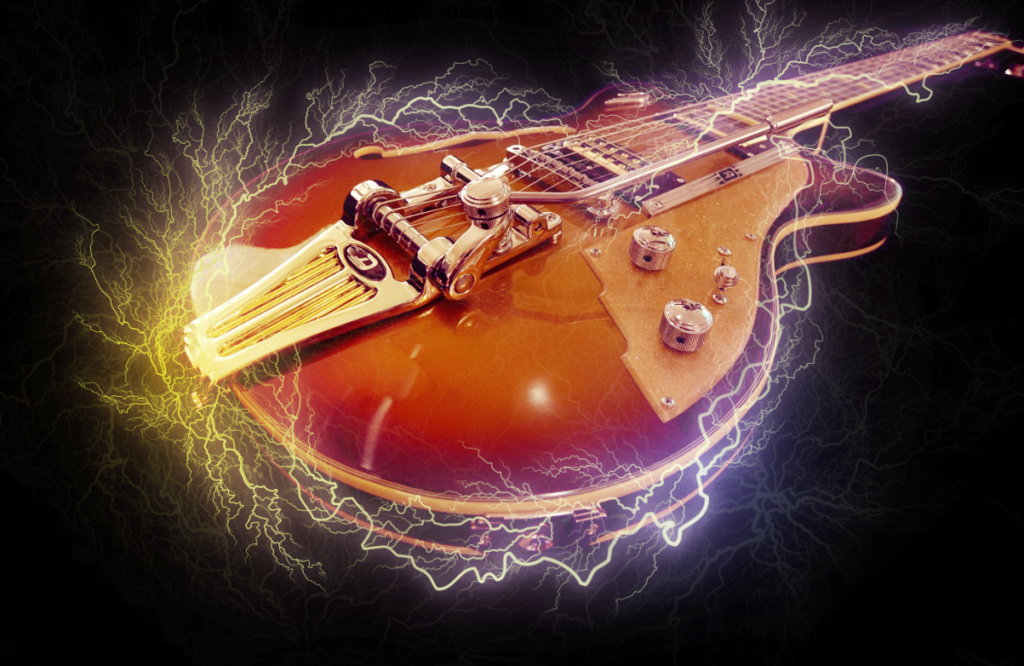
The Final Image
This is my final image. I hope you liked this tutorial. If you want to support me feel free to buy something from my shop or share this tutorial on social media. There are some convenient share buttons below.
Only one comment. SUPER!
crazy!!!! “102 Lightning brushes by xresch” are worth each penny!
Thank you very much Rainer for the really positive feedback!
Hi I have just down loaded the lightning effects can you advise the brushes little icons you can choose and the assets section the icons are very dark I can hardly see them to be able to make a selection is there some way that they can be more discernable
Sorry for the late reply. This is an issue I also struggle with.
I have included the PNG files that can be used to find something you need fast.
Also Walt has posted a PDF overview for the brushes in the Affinity Forum:
https://forum.affinity.serif.com/index.php?/topic/154293-preview-pdf-for-the-102-lightning-brushes-by-xresch-affinity-store/
owwww thanks