In photoshop and affinity photo, you can use layer styles to give a fire like coloring to smoke brushes.
To boost your design assets with smoke brushes, you can check out my packages on the following page >> https://www.xresch.com/design-products/smoke-brushes/
Photoshop
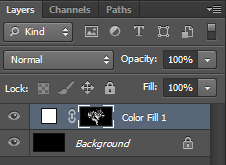
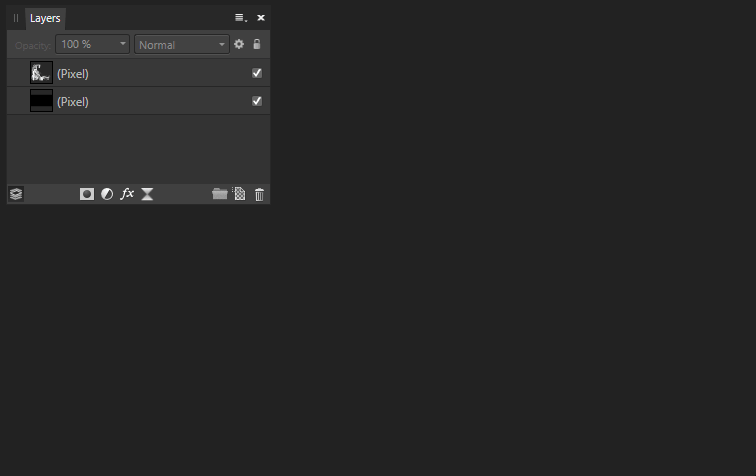
Step 1: Smoke on Solid Color Layer
I prefer to use Solid Color Layers instead of regular transparent layers, as you can adjustments later you cannot achieve with transparent layers, like changing the contrast.
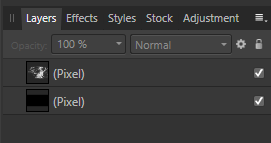
- Create a Black background layer.
- Create a new solid color layer using “Menu >> Layer >> New Fill Layer >> Solid Color…”. Choose pure white as the color.
- Select the mask and press “Ctrl+I” to hide.
- Use a smoke brush with white color on the mask to create some smoke.
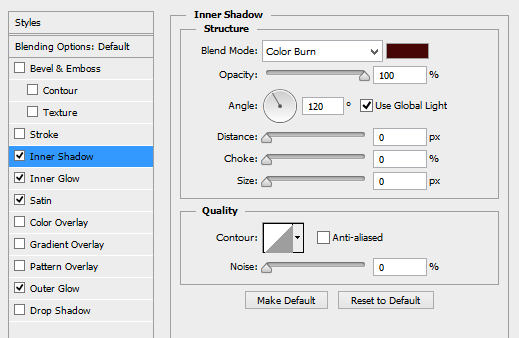
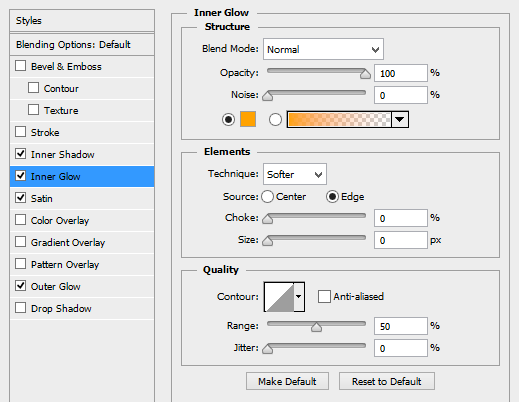
Step 2: Adding the Layer Styles
Double click the smoke layer to open the layer style and add the following styles:
Inner Shadow with color #470606:
Inner glow with color #ffa200:
Satin with color #ffa442:
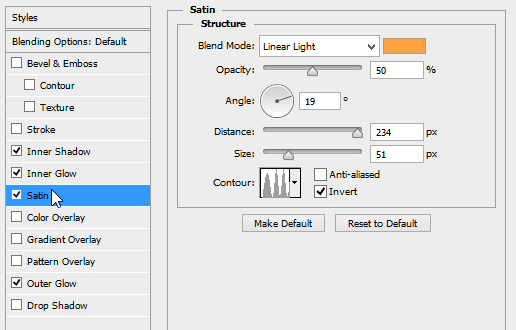
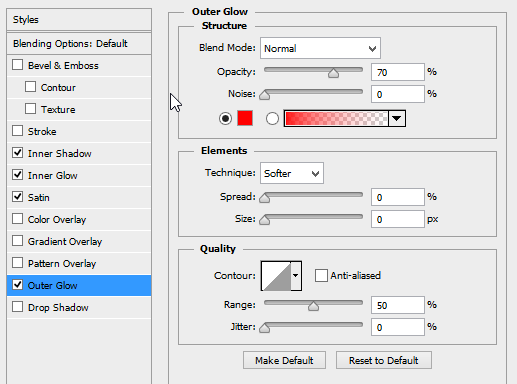
Outer Glow with color #ff0000:
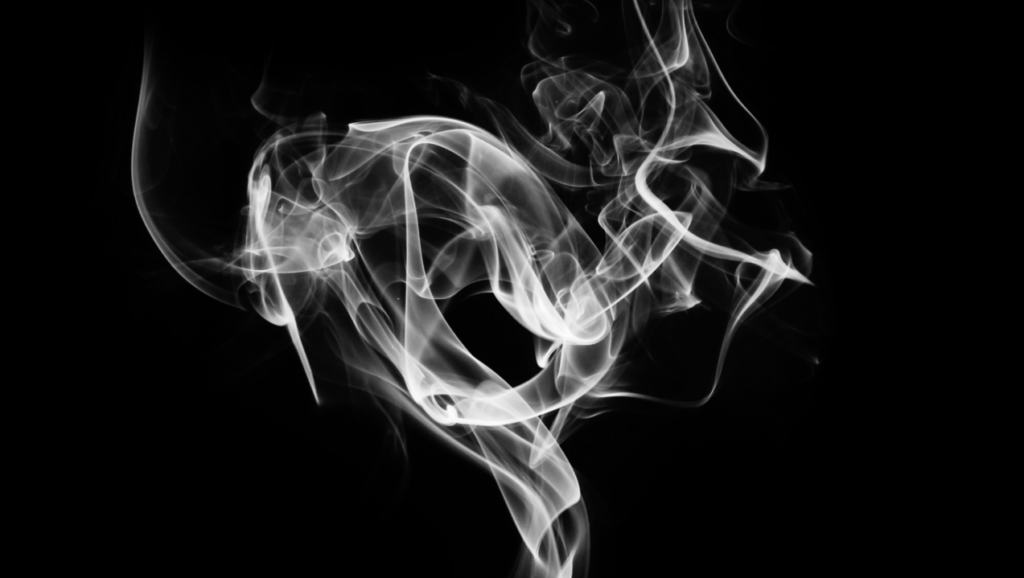
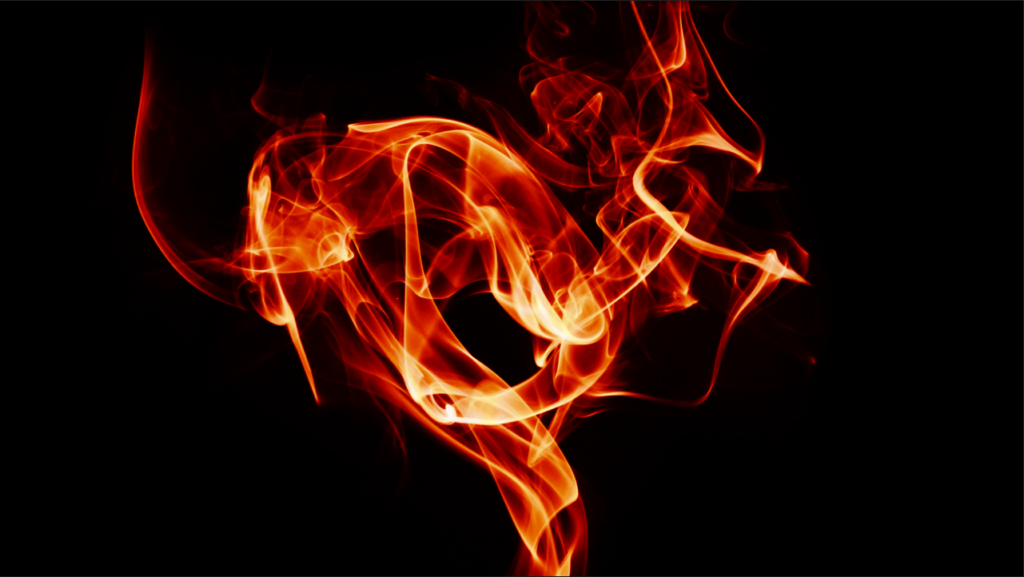
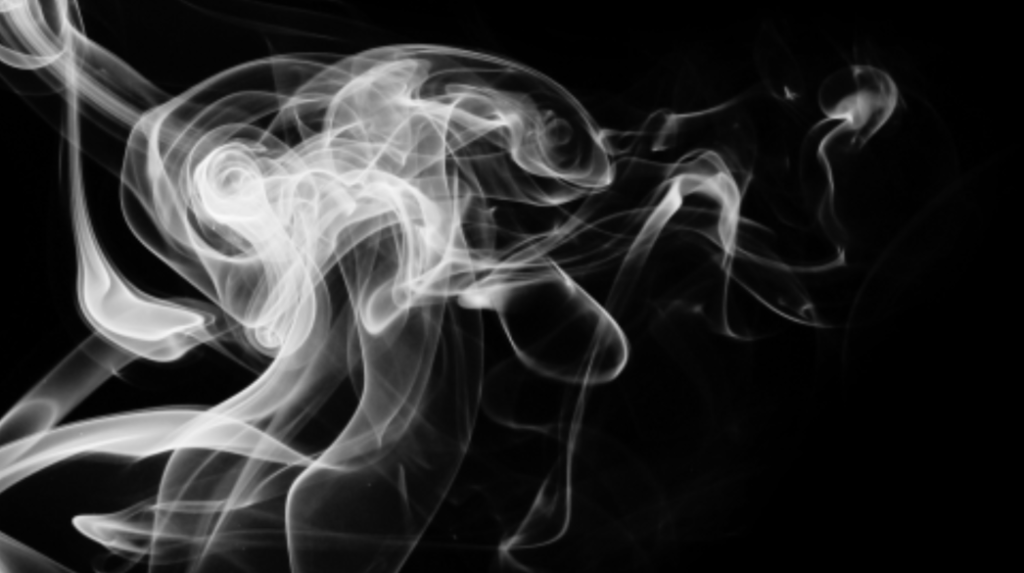
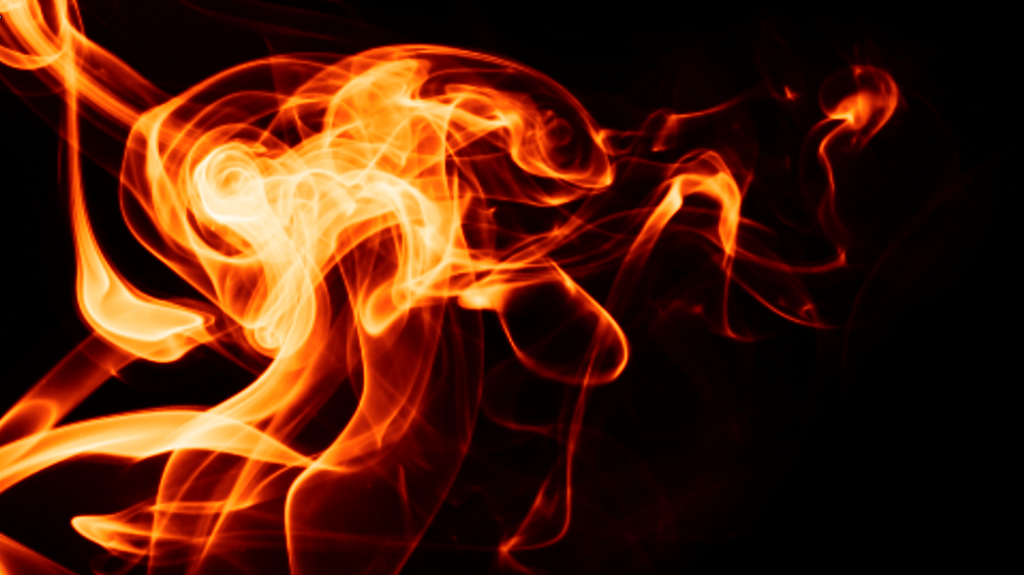
The Result in Photoshop
Using the above styles you will end up with a nice and warm effect:
Affinity Photo
Step 1: Smoke on Black Background
- Create a Black background layer.
- Create a new layer and paint a smoke brush with white color on the layer.
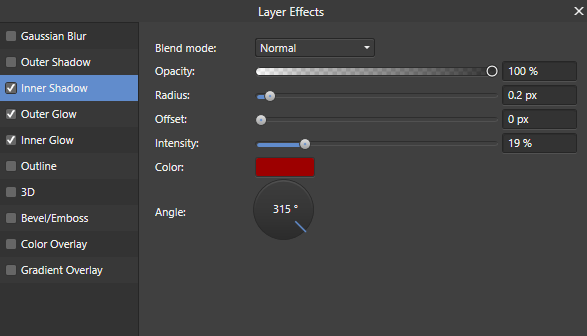
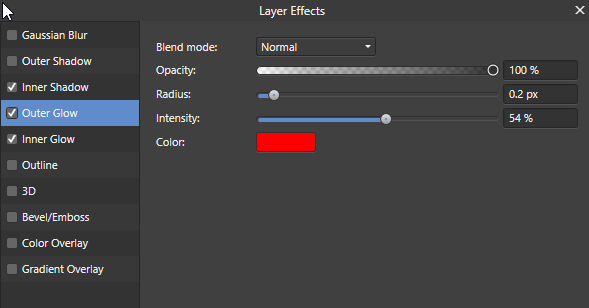
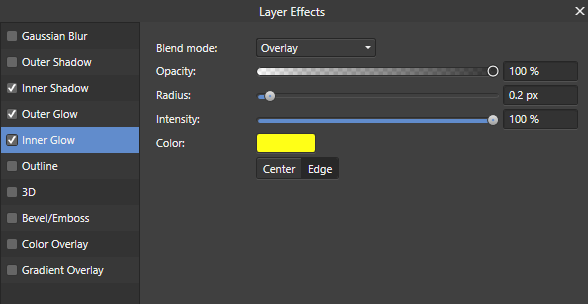
Step 2: Adding the Layer Styles
Select the smoke layer and click the “fx” symbol to open the Layer Effects.
Add the following styles.
Inner Shadow with color #410000:
Outer Glow with color #FF0000 :
Inner Glow with color #FFFF17:
The Result in Affinity
Using the above styles you will end up with a nice and warm effect:
[…] Here are various ways how you can enhance a fire effect I have explained in the tutorial Fire Effect: Smoke Brushes and Layer Styles. […]
[…] Fire Effect: Smoke Brushes and Layer Styles […]
The above settings for Photo do not work right unless you set the overall layer to average in version 1.7.1 and in current Beta.
[…] image, your have found yourself the right tutorial! Here I will show you how you can apply my smoke and layer styles combination to a colored image. I will use Affinity Photo for this tutorial, but the same process can be done […]
How does this work in GIMP? I can’t even find any of your brushes to be white in colour :/
Gimp needs a different approach.
Brushes in Gimp are not based on alpha values but are actually based on colors.
To get a white smoke, use a brush on an empty layer and invert the colors.
Afterwards use a gradient map as shown in the following post:
https://www.xresch.com/fire-effect-smoke-brushes-gradient-map-504/
Thank you for your reply, you are a genius 🙂 Thank you so much! If you had a full Gimp course, I’d consider buying it!
Thank you very much for the positive feedbacj, you’re are very welcome. 🙂
I am using Affinity Photo 2.1.1. After doing everything exactly as you describe but my smoke still looks black and white. What am I missing?
OK, I got it to work because I wasn’t doing “exactly” the same thing. It looks like you can’t just import a black and white image of smoke into the top layer. You have to actually use the brush to draw the smoke layer (using the xresch smoke brush). I don’t understand why that is so. Perhaps it’s because the xresch smoke has an “alpha” layer but when you import an image of smoke there is no alpha. If this is true, then how might I be able to replicate this process using an imported image of smoke?
Hi Alfredo,
the layer styles only work properly when the layer has transparency.
Using a black and white image does not work as it does not have any transparency.
You could import the smoke as a PNG with transparency.
Another way would be to use the black and white image as a layer mask to get the transparency.
Kind Regards
Reto